
How to Accept Bitcoin Payments on Ghost Blog

If you're looking to elevate your Ghost blog's financial landscape and tap into the growing world of digital currencies, you're in the right place.
Blockonomics' latest integration allows you to accept Bitcoin payments for your Ghost memberships directly to your wallet.
In this guide, we will look into the process of accepting Bitcoin payments on your Ghost blog using Blocknomics, opening up new possibilities for monetization and allowing you to connect with a broader audience.
If you prefer a video guide of the same, check out the video below:
Part A: Setup
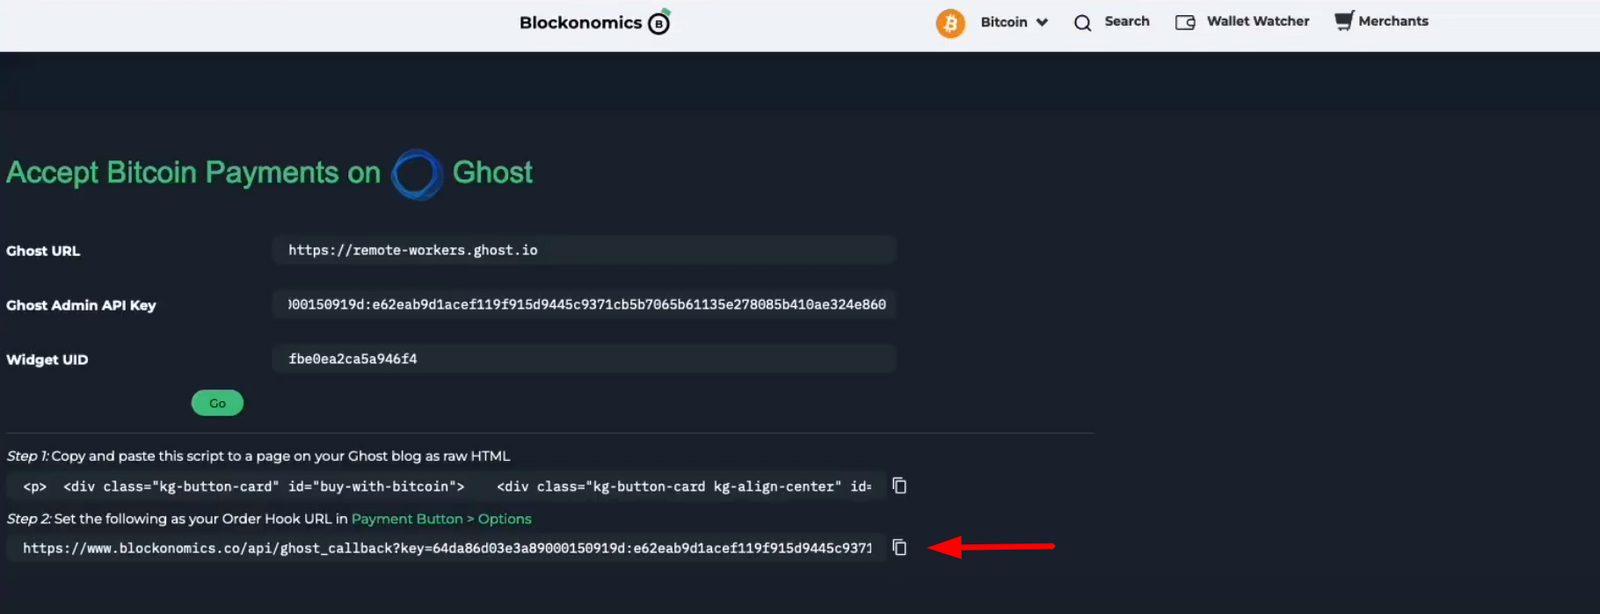
Head on over to Blockonomics Ghost Utility, once there you will be prompted to fill in the following information:
- Ghost URL
- Ghost Admin API Key
- Widget UID
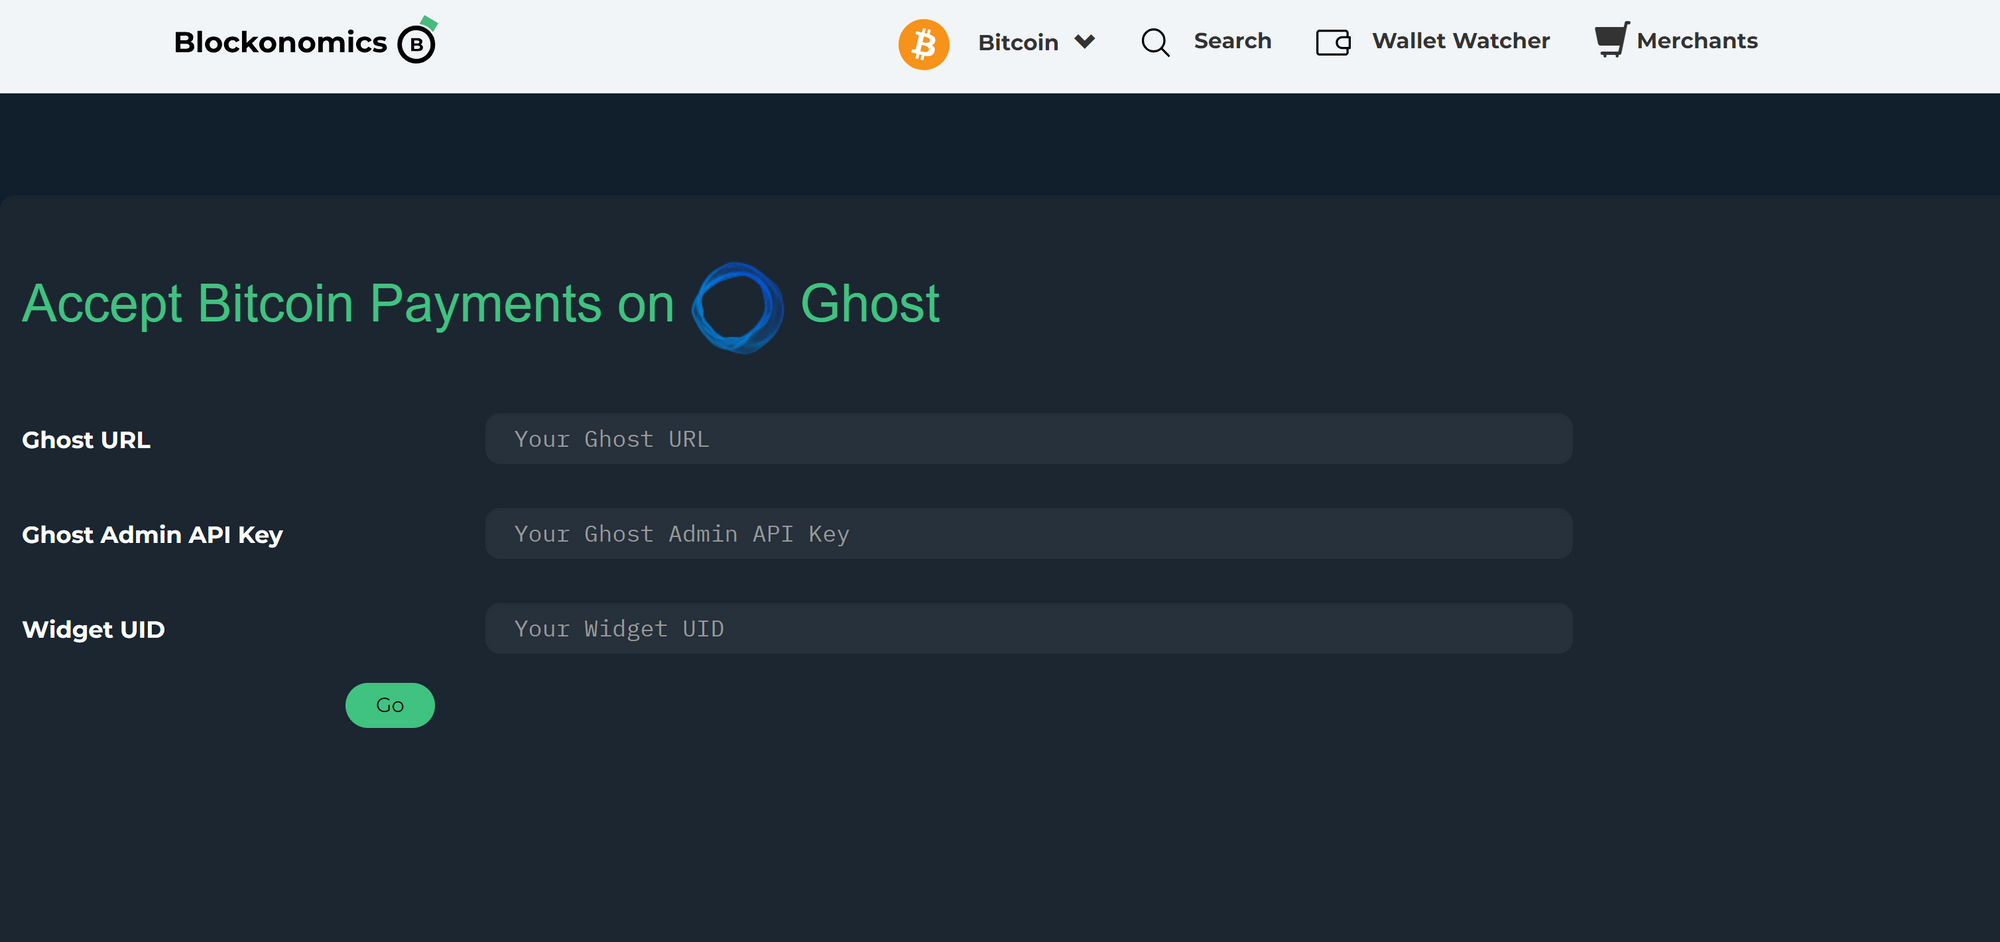
Ghost URL:
The URL/site address of your Ghost blog goes here.
Ghost Admin API Key:
To access this key, head on over to your ghost admin panel, and go to Settings -> Integrations (under advanced) -> Add Custom Integration
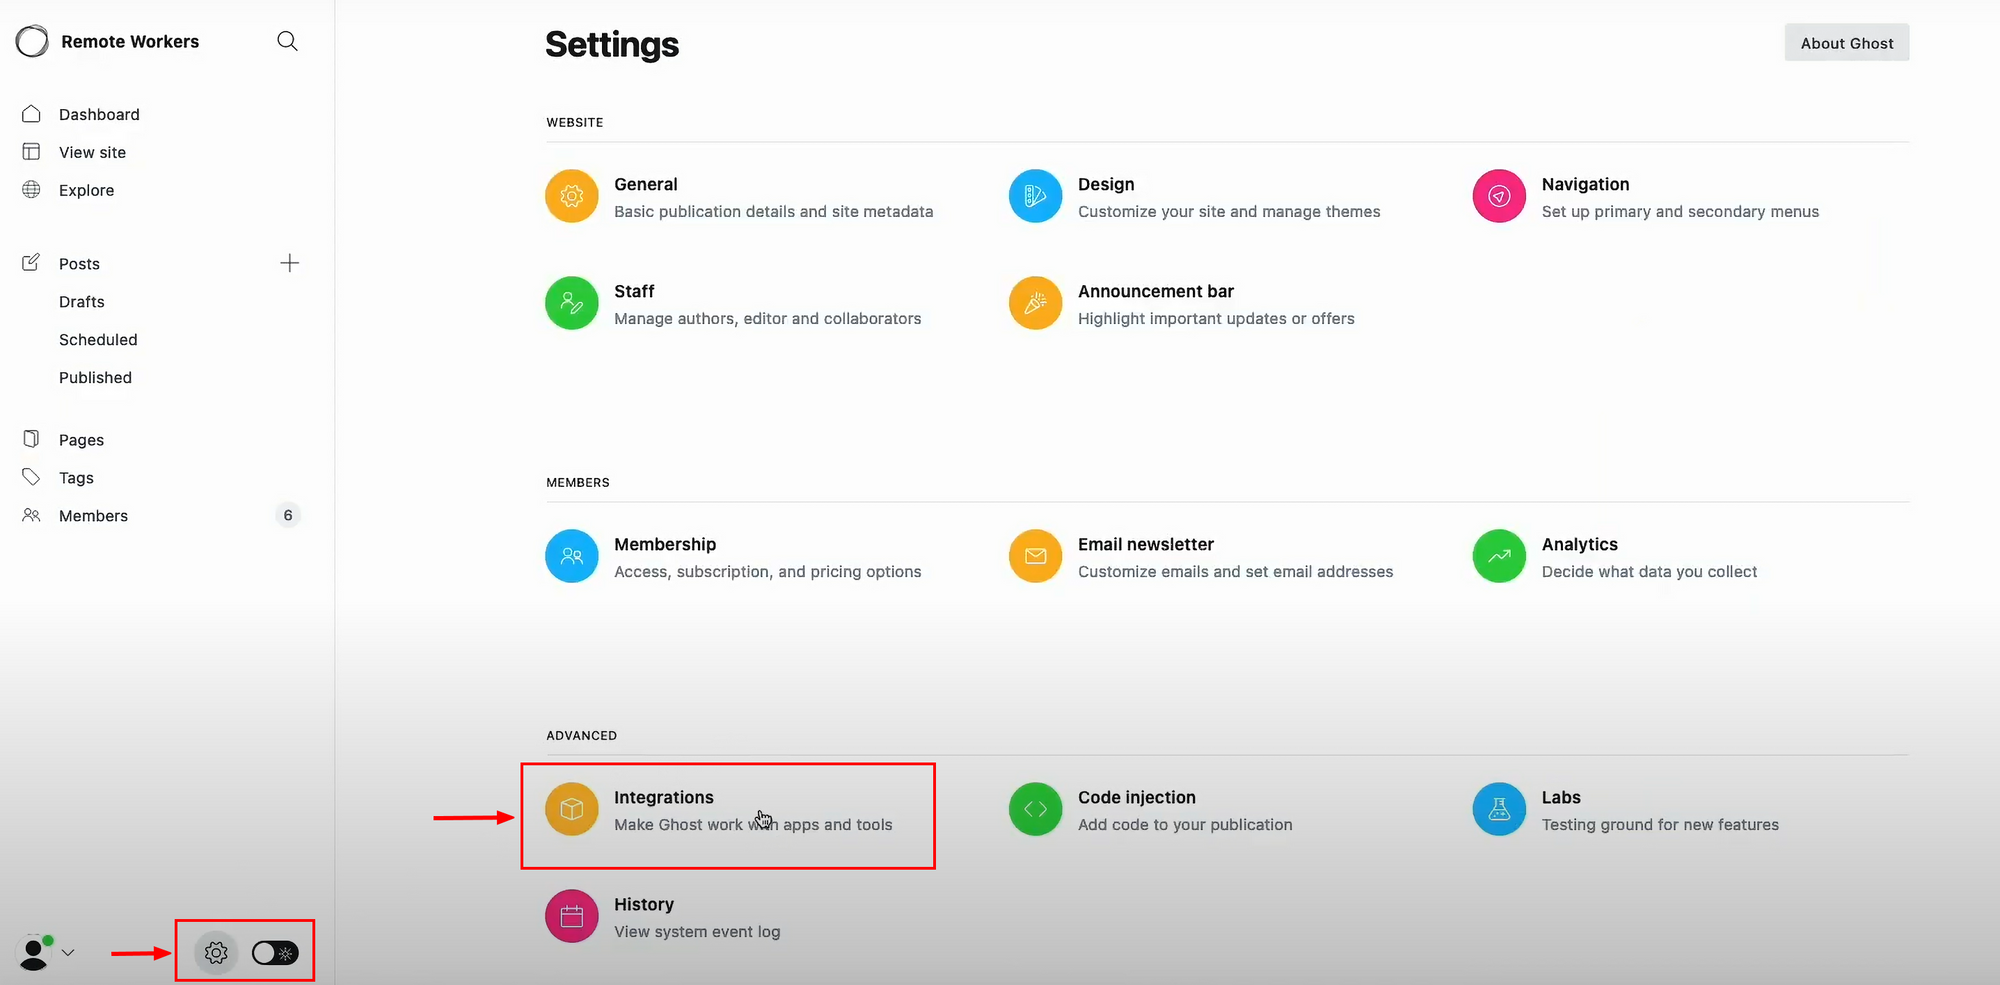
You can add a Name and Description for this integration to your liking.
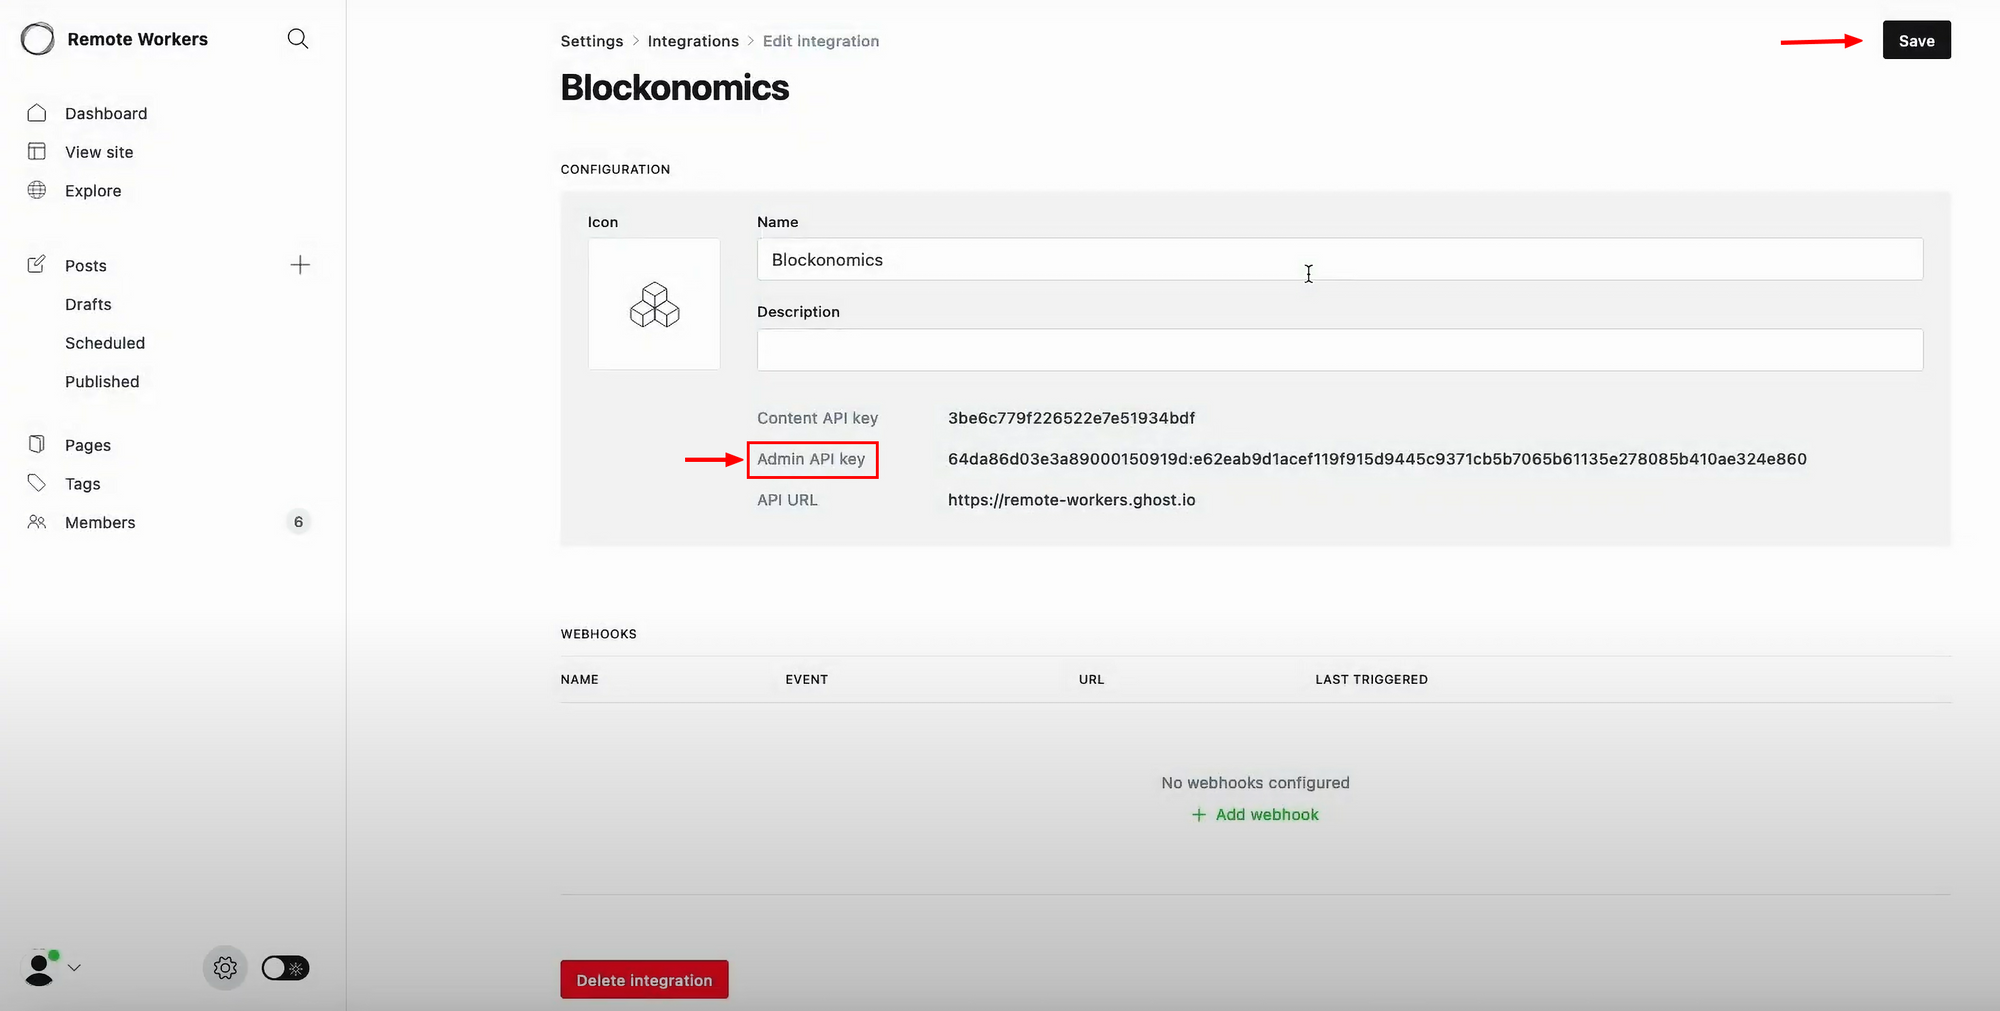
You will see an Admin API Key here, copy this key and paste it into the Ghost Admin API Key section of the Blockonomics utility.
Widget UID:
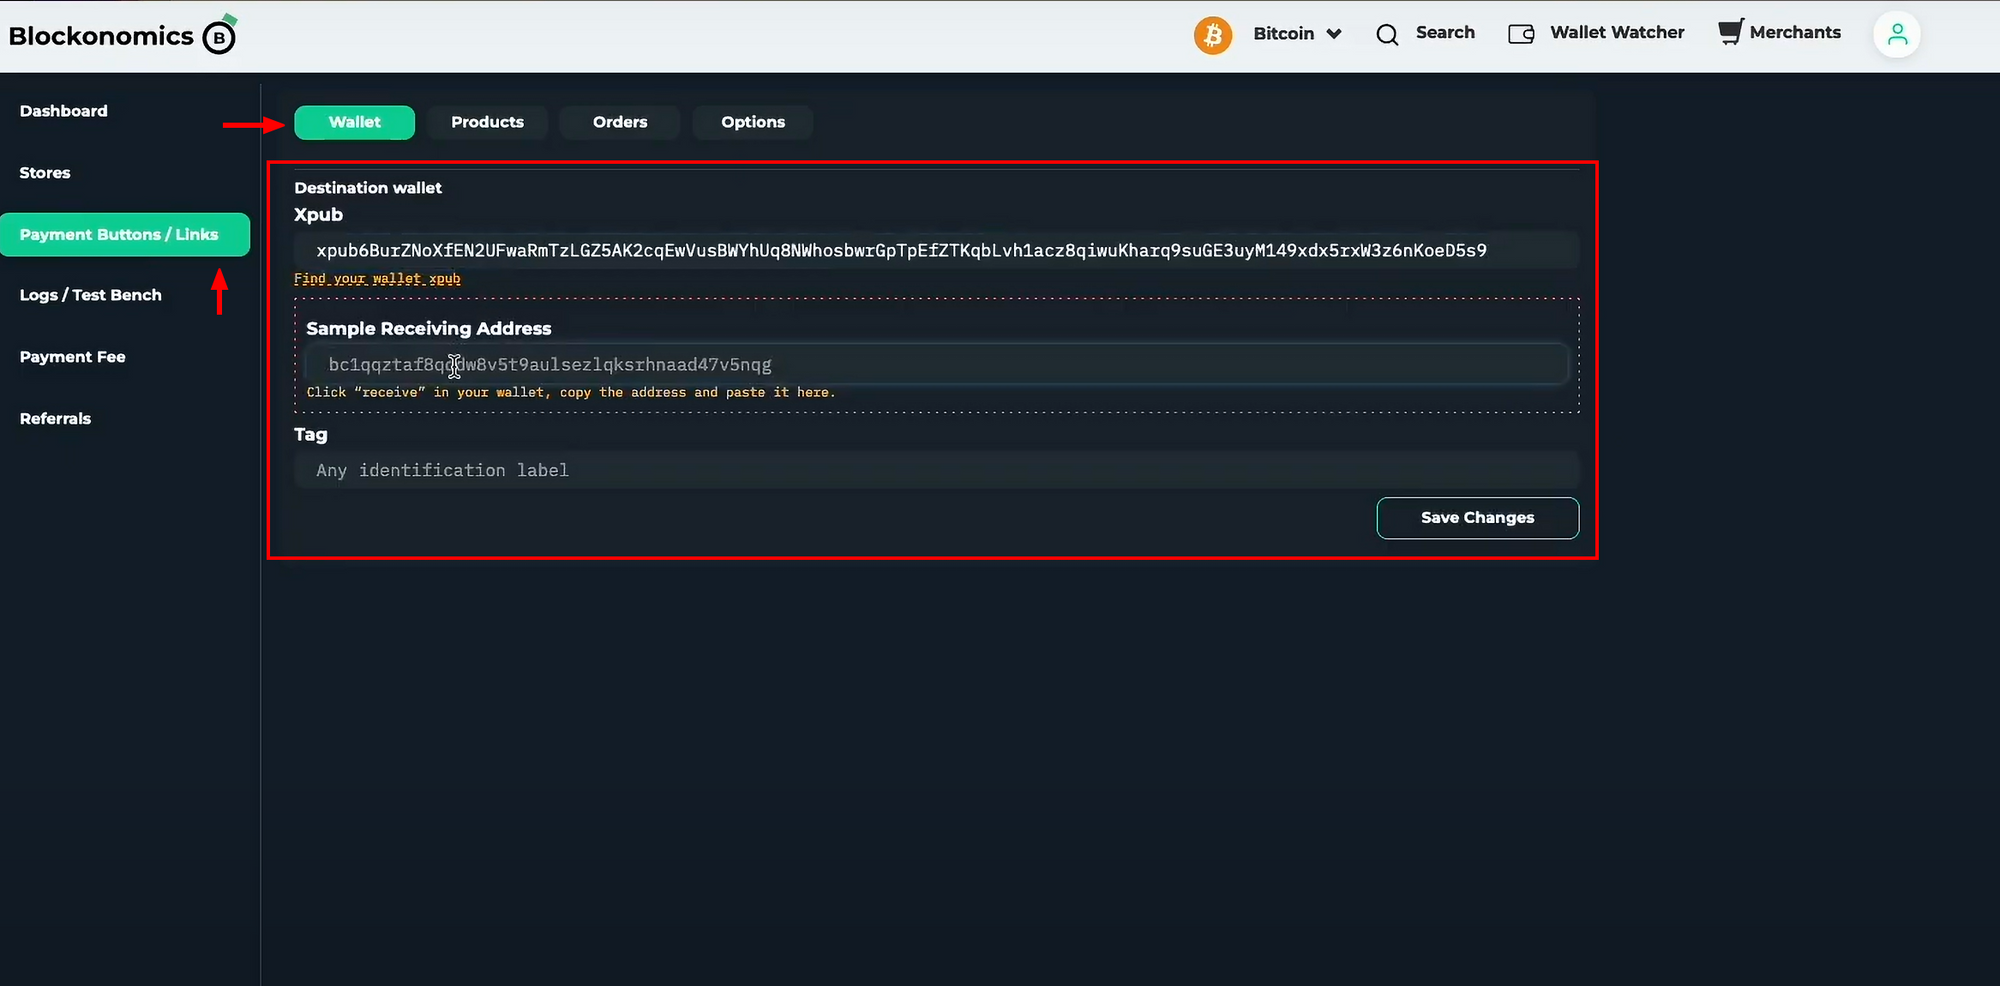
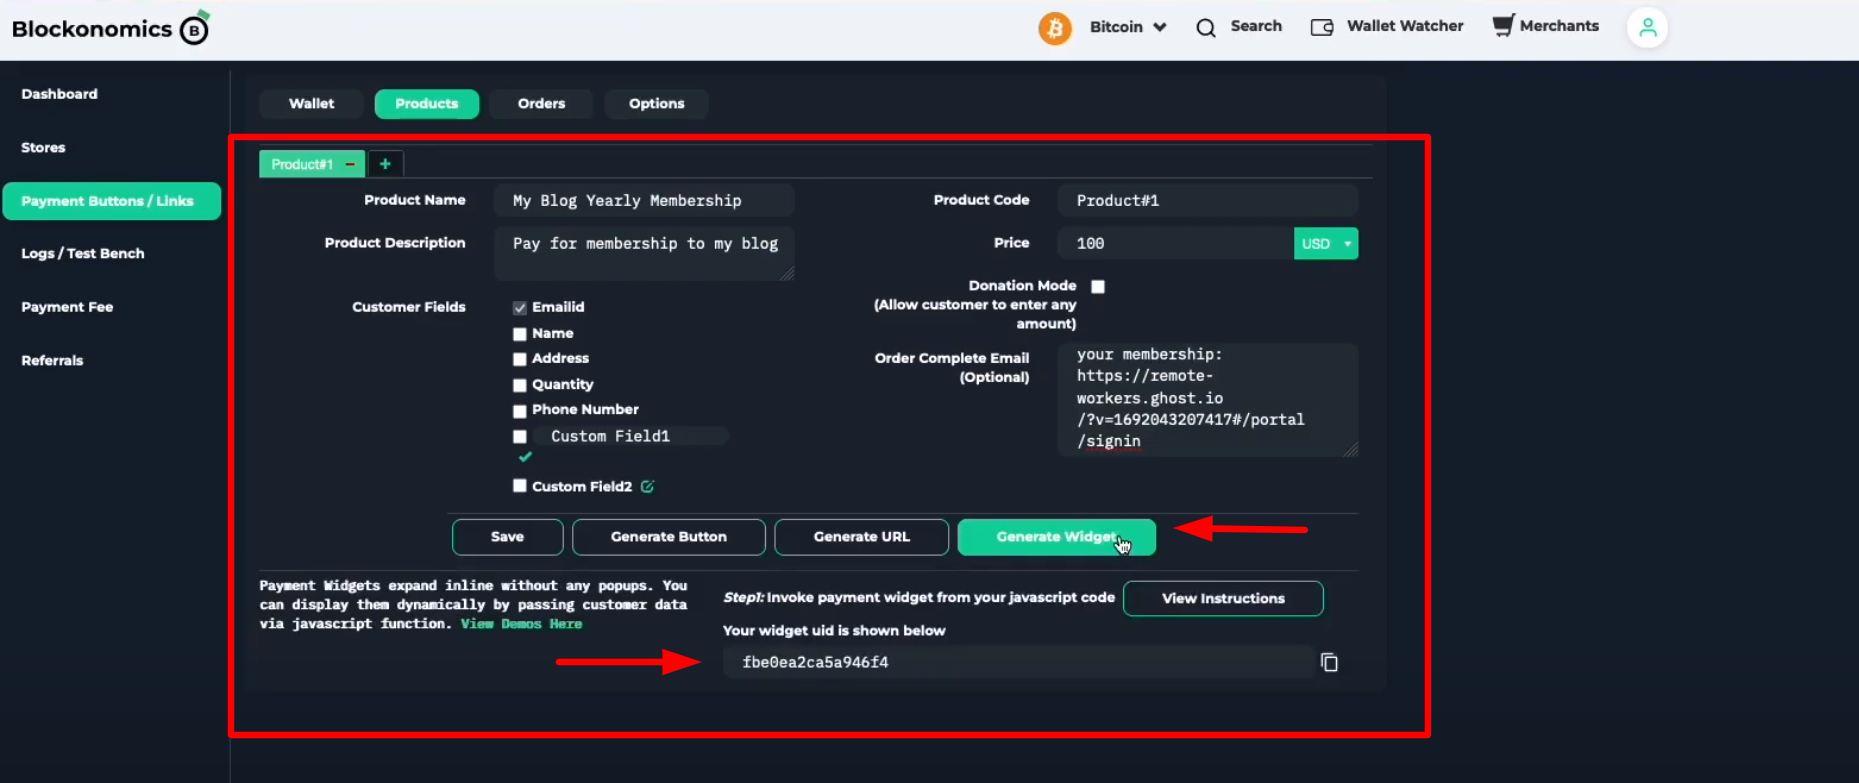
To get this ID, head on over to Blockonomics merchants page and create a free account. Once logged in, click on the Payment Buttons/Link.
In this section, under the Wallet tab, add the xPub Key of the Bitcoin wallet where you wish to receive your payments.
[To find the xPub key of your wallet, please refer to this article]
Once the xPub key has been added, go to the Products Tab and enter the details about your product (in this case, it will be your blog membership). You can enter details such as:
- Product Name
- Description
- Price
- Custom Fields (Any details you wish to collect from paying customers)
- Order Completion Email: Any redirect URL or post-payment details to access the paid features can be added here.
Once all the fields are filled, click on Generate Widget button at the bottom.
You will be shown a Widget UID, copy this figure and paste it into the Widget UID section of the Blockonomics utility.
Tier and Duration Settings:
Once all the 3 fields are successfully added in the step above. Click on Go.
This will take you to the page to add how long you want a membership to last, and the tier for the membership if you have multiple tiers. You have to have the tiers set up first in Ghost as shown here: https://ghost.org/help/tiers/
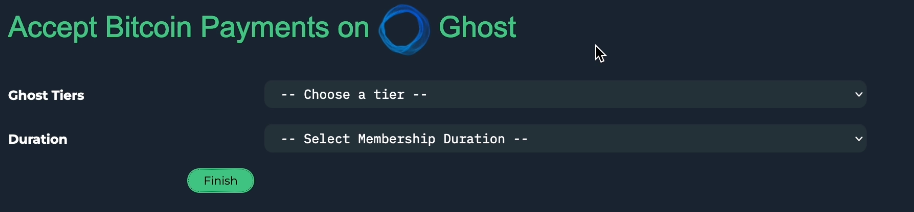
Importantly this means that you have to create a different payment link for each tier and/or duration you want!
Part B: Integration
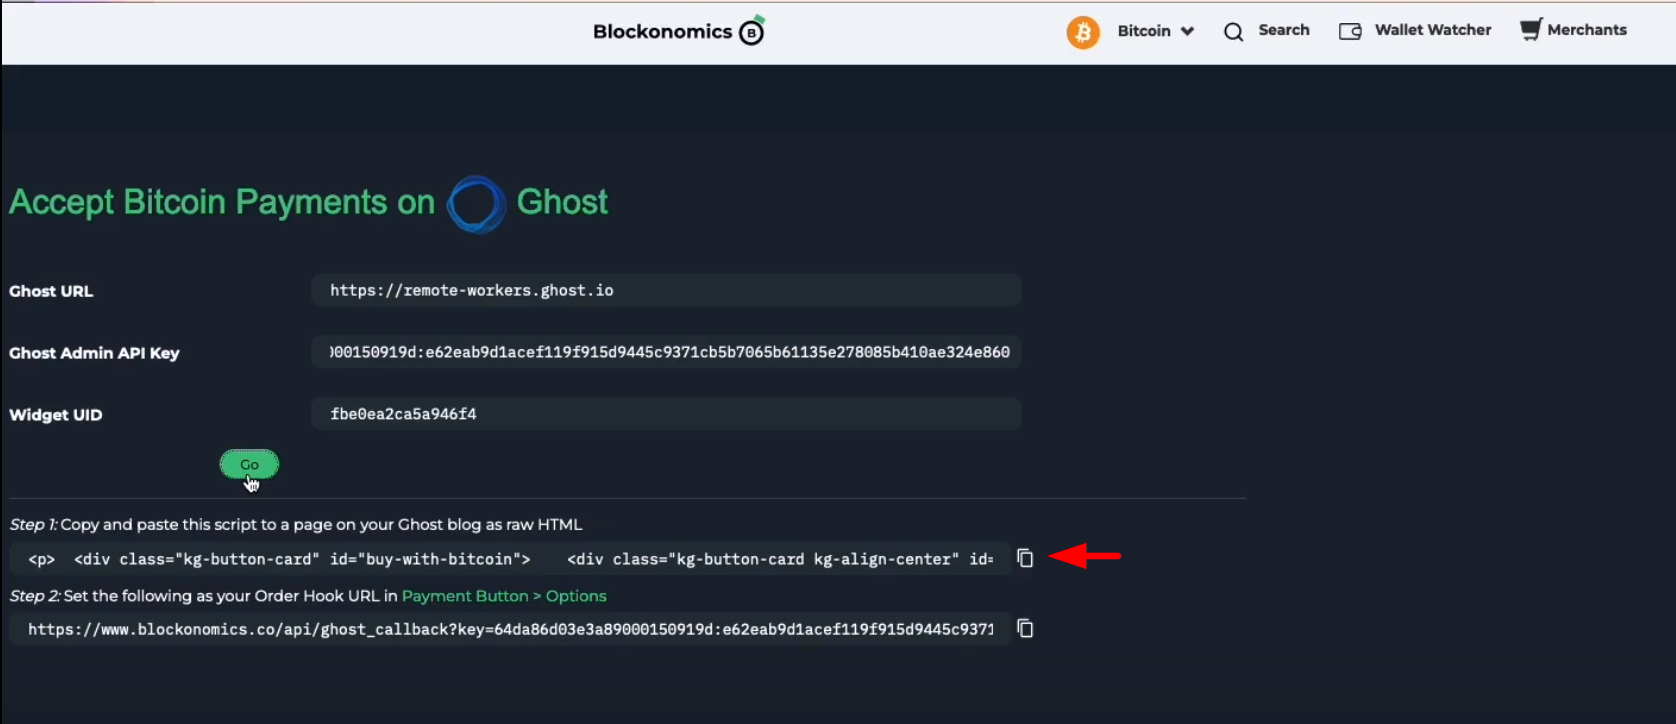
Once everything is successfully added in the steps above, click on Finish and you will be prompted to complete 2 two more steps.
1) Payment Page
Copy the code that is shown in Step 1.
Then head on over to your Ghost Admin panel. Click on Pages -> New Page
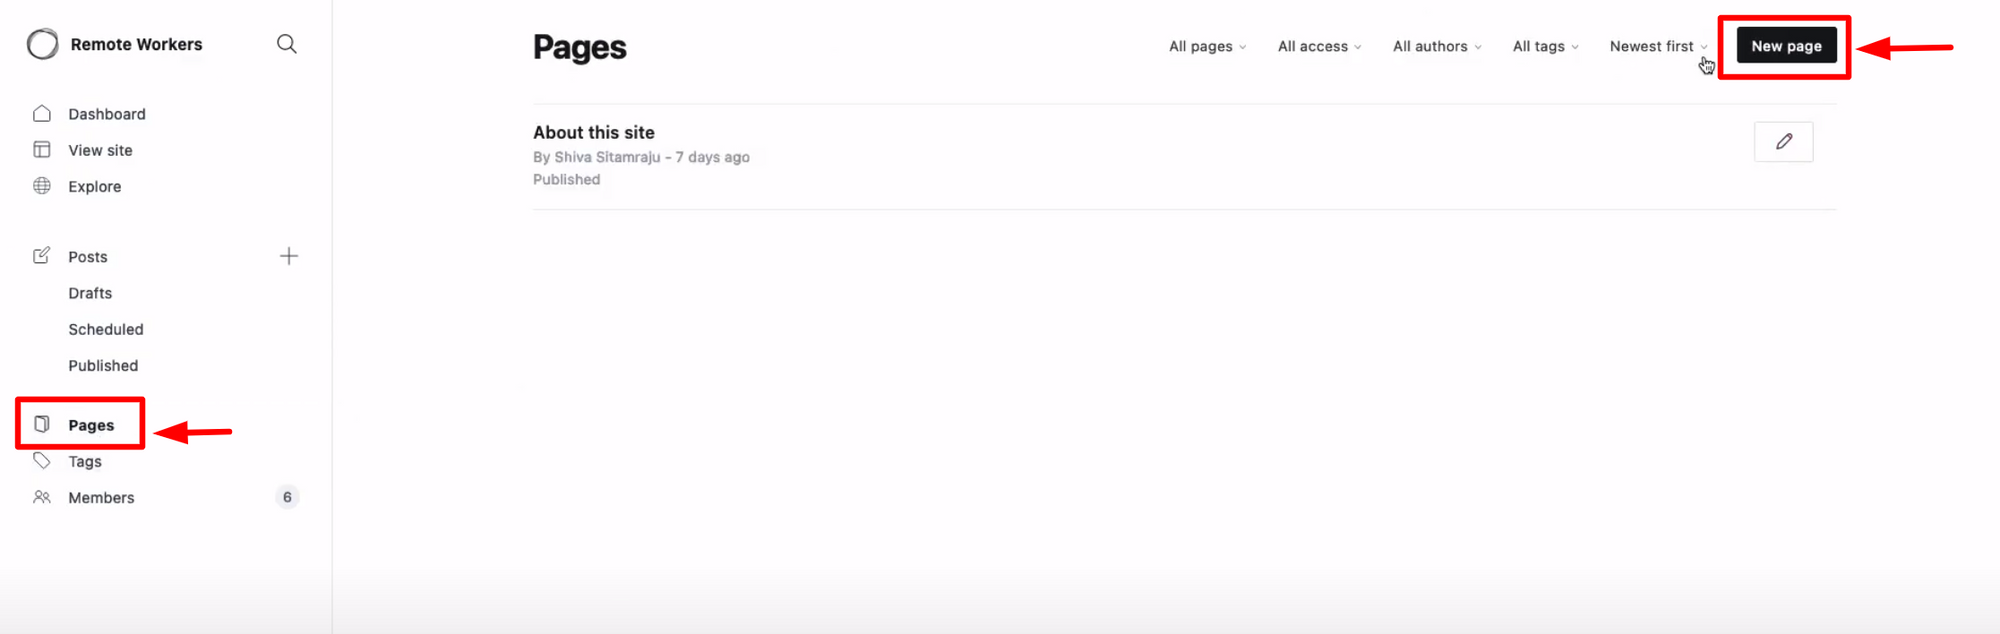
This is the membership page that your users will see when they make the payment, so feel free to design this page to your liking.
The important thing here is to add an HTML card in the body. In the HTML section, paste the code that you copied earlier.
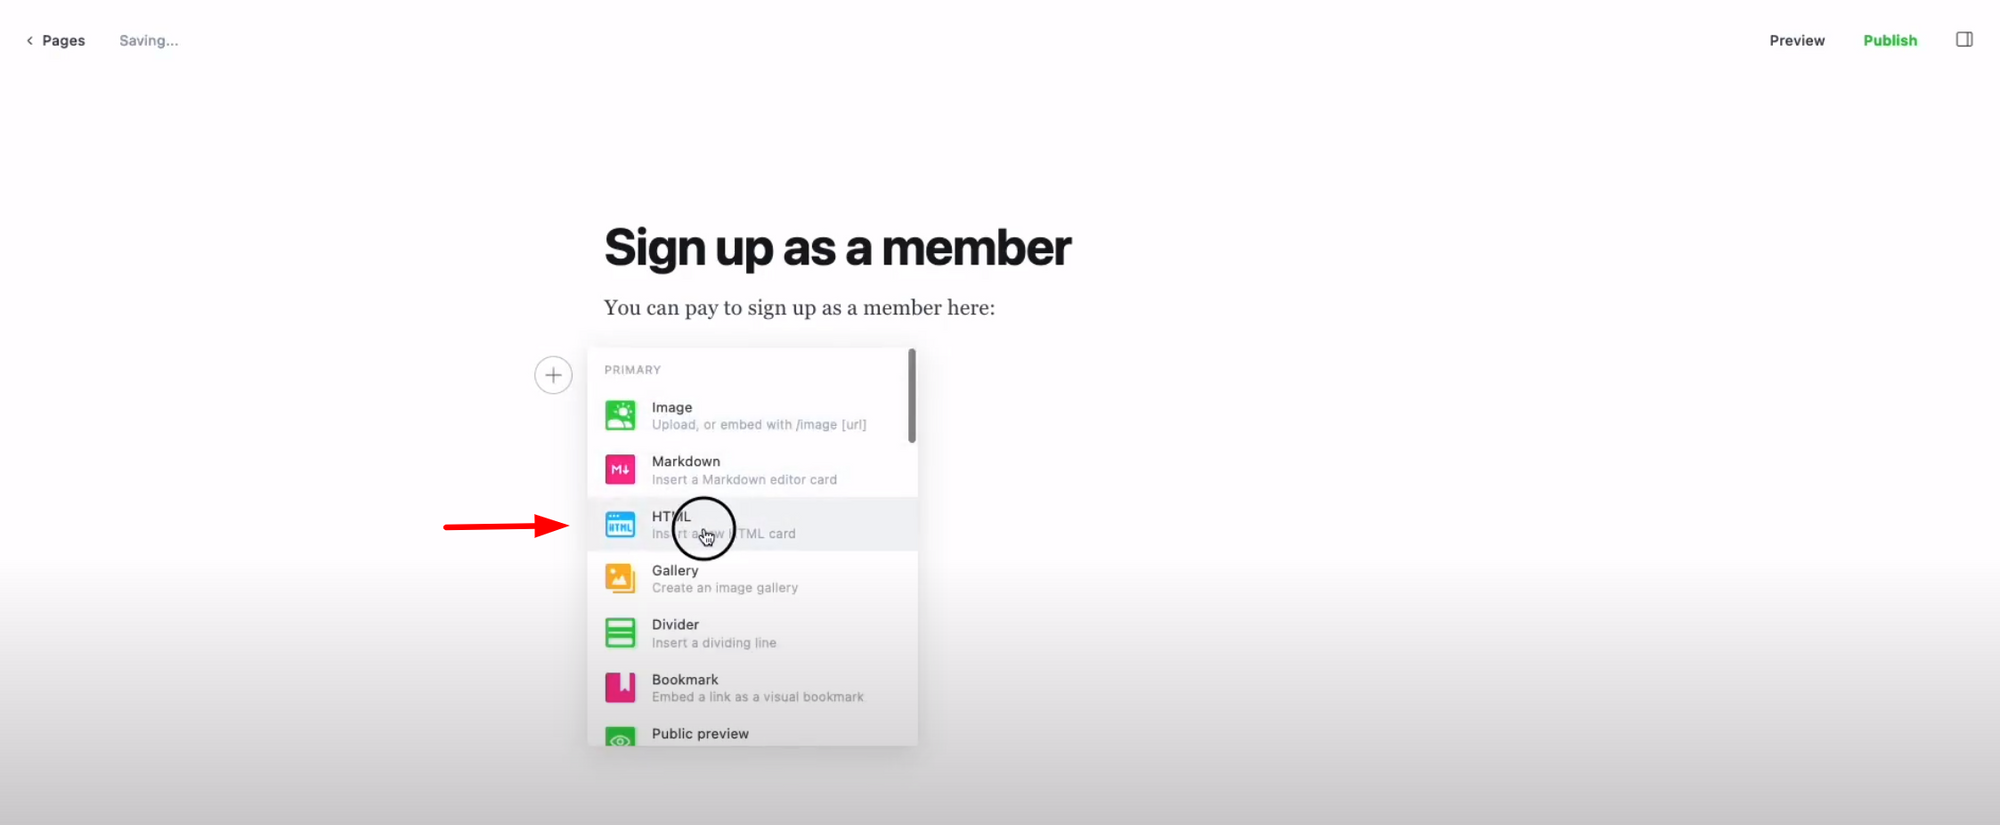
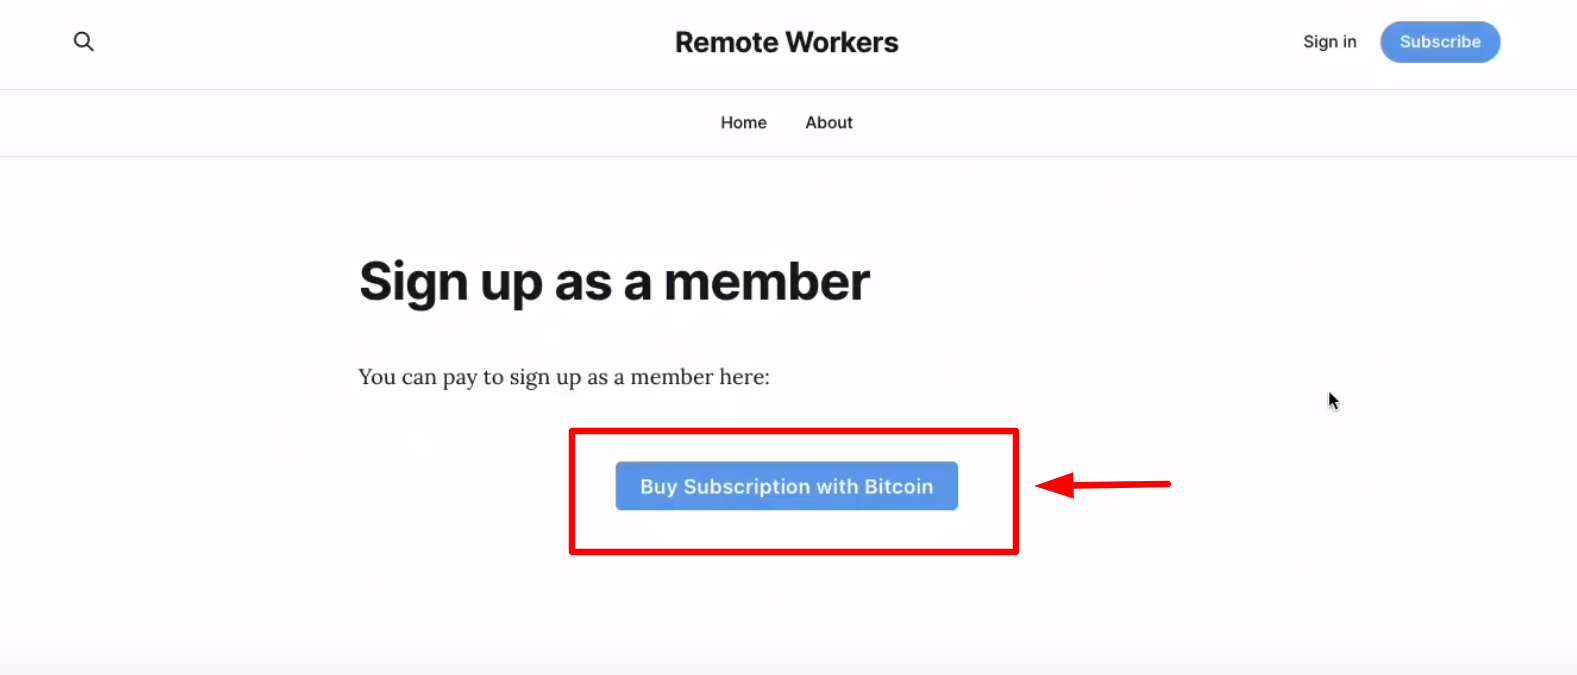
Upon completion, Publish the page and you will see a dedicated pay button on this page.
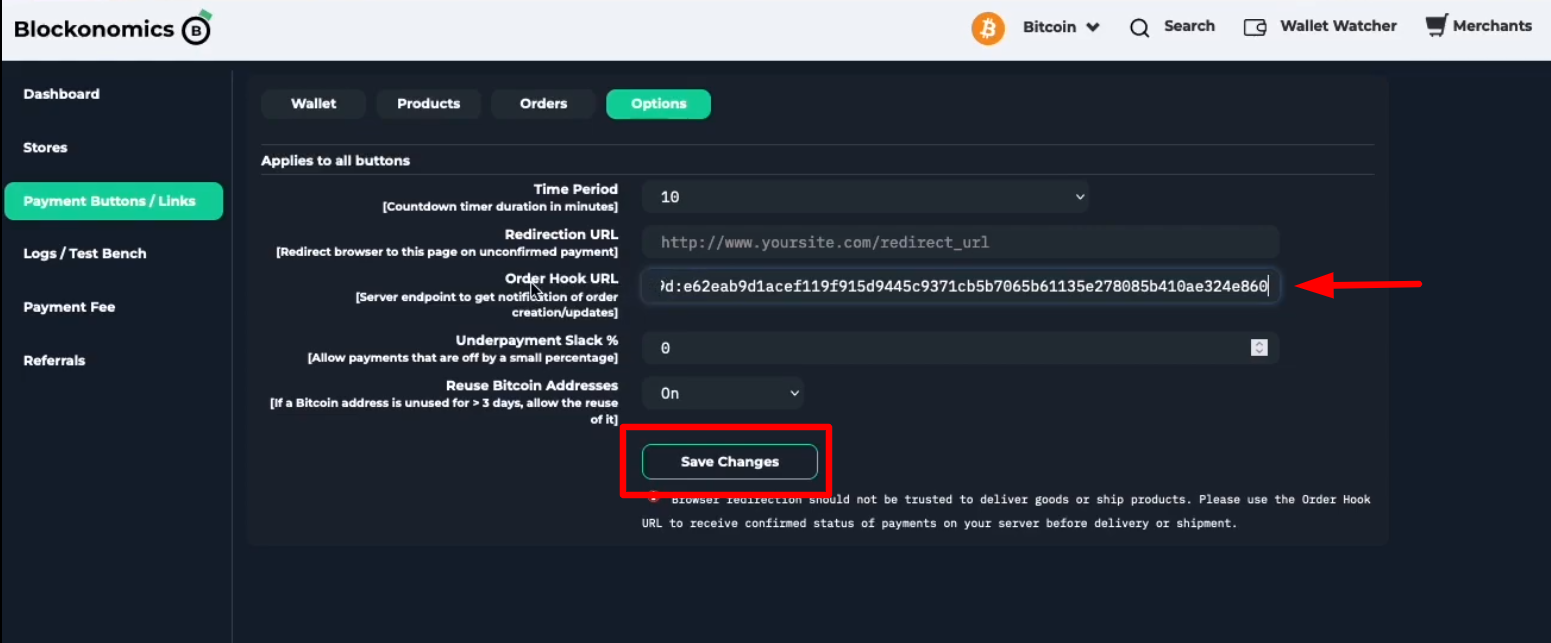
2) Order Hook URL
On the Blockonomics Ghost Utility, copy the URL mentioned under step 2.
Then head to Payments Button -> Options in your Blockonomics Account and paste the URL in the Order Hook URL field.
Don't forget to Save changes!
Part C: Testing
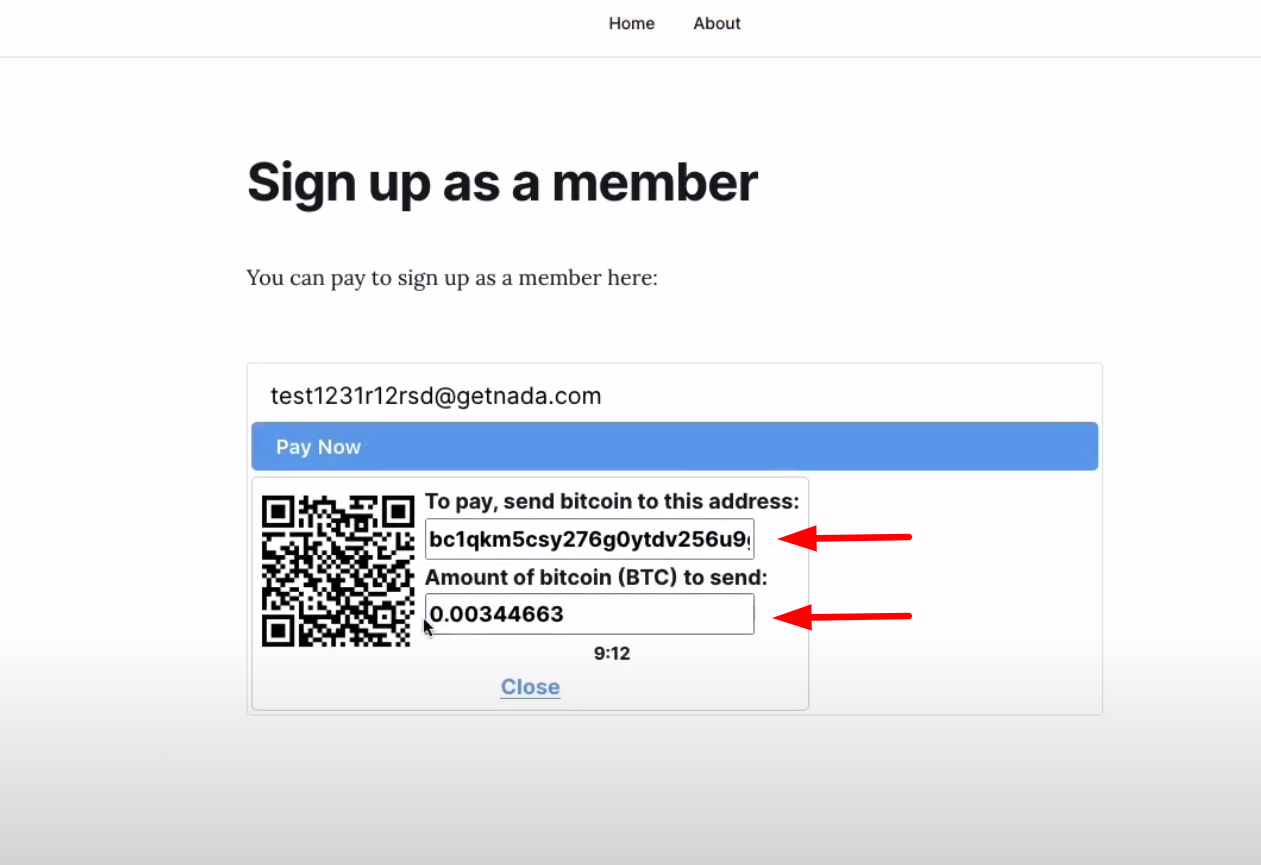
Your Bitcoin payments are now successfully set up on your Ghost Blog, you can test your payments integration to see if everything is working fine.
To do so, go to your membership page and select the pay now option to make a test payment.
You will be shown a Bitcoin address and the amount. Copy both these fields and head to your Blockonomics account and go to the Logs/Test Bench section.
Enter the details in the respective fields and click Send test payments.
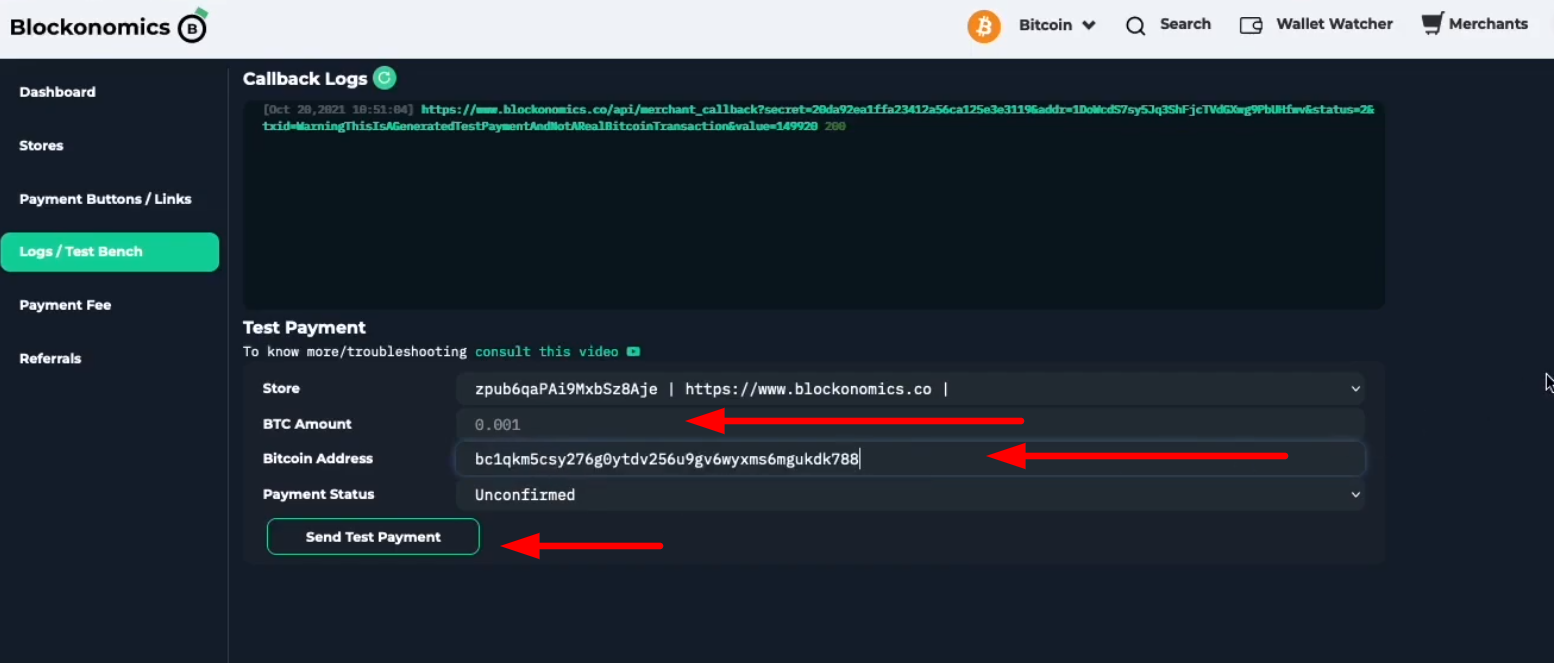
You should successfully receive a payment confirmation in the email provided.
That it! You have successfully integrated Bitcoin payments into your ghost blog. Happy Blogging!


Comments ()